On the same day that we made the Zoetrope films we also had a go at making some very short films just using the classroom. Again they were to tell a story but this time it was all going to be live, we had to think about props and costumes and what shots there were going to be in the film. This was to get us thinking about how we can tell a story and to get us used to using the Flip cameras to film each other.
At the end of the day we used the NetBook computers to transfer the film from the camera and onto the school's network. We had a bit of trouble with this because of the space available and the number of film we had made.
Andy discovered a few other problems later when he found that Windows Movie Maker was not able to read the films from the flip cameras. Dave and Andy took one of the cameras away and tried to come with a solution over the weekend. Luckily there was a way of doing it, and although we took a lot of the lesson getting the films into a form that could be edited we managed to do a bit of editing, before the day was out.
Here is how we got the films in Windows movie maker,
1. Put the film back onto the Flip Camera, using the file manager (the flip software will only read films that are on the camera).
2. Share the films to the internet from the Flip Software, overriding the default easy settings we were able to save the files onto the NetBooks, this process automatically converted the video from .mp4 to the Windows Media Video format (.wmv).
3. We were then able to import the films into Windows Movie Maker.
Editing the Films
Just to get used to using the software we used only a few of the movie clips we made using the flip cameras.
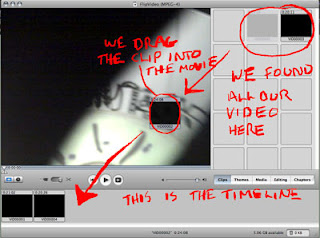
Once the clips had been imported into Movie Maker we were able to make them shorter by cutting out the bits we didn't want. We were also able to put clips together in a sequence so that they told the story. Using the effects panel we added transitions between the clips to make them flow together, these included cross-dissolves, shutters and wipes. There were other effects that let us slow down or speed up the video, or change the colours. Some other effects allowed us to make the film look old by making it black and white and adding grains and scratches. The effects were used to enhance the film, the storyline, and the feel of the film. We also added titles and credits so that people watching the film would know what is was called and who had been involved in making it.
NOTE these images are taken of iMovie for Apple Mac OS X, it looks different but works on the same principal...
Although very short the films did tell a story and it was fun to watch the finished pieces back at the end of the day.
Wednesday, 24 February 2010
Subscribe to:
Post Comments (Atom)


No comments:
Post a Comment
Note: only a member of this blog may post a comment.